
Solar surveying used to be a dichotomy: you either did onsite surveys or you didn’t do them and relied on best guesses from remote satellite imagery.
With new drone technology, more options have emerged. Still, much of the solar industry uses tape to collect measurements manually. But for those with a drone, there are two common methods: (1) fly a Point of Interest (POI) flight path, taking 100+ images from all perspectives of the property, or (2) take a top-down photo with a drone to create an updated map.
The latter approach seems like the best of both worlds; unfortunately though, it ends up causing a host of new problems. While it’s quicker than a manual survey, and a surveyor stays off the roof, it doesn’t actually save a lot of time or eliminate the risk of human error for three distinct reasons.
1. It’s nearly impossible to get a perfectly top-down photo
Top-down drone photos, like satellite imagery, will never be perfectly accurate. Whether due to wind conditions, drone pilot skill, or the slant of the ground, the image will always have some skew to it. This is something that can’t be corrected with pilot skill either, as the environment or land angle is impossible to fully control for.
There is a way to fix this, called “ortho-rectification,” but the process is time-consuming, expensive (because of the technology and specialized labor required), and irritating for designers. Since the solution to this problem is so arduous, it often doesn’t get done, meaning panel designs are based on a skewed image which can lead to redesigns or install-day call-offs.

Link to where screenshot was taken: https://www.google.com/maps/@42.5904753,-74.9437671,297a,35y,19.92h/data=!3m1!1e3
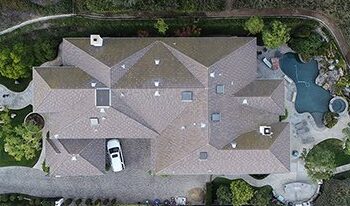
Scanifly’s VP of Customer Success, Tim Jackson, commented further by adding that “A drone top-down image distorts the way you can not really correct for. Because the photograph is in a perspective view and is just a single image, the closer an object appears to the drone sensor, the larger it will appear. You will notice on a top-down drone photo of a house that the ridge/peak (that is closest to you) appears longer than the drip edge by the gutter (further from you), even though they are both the same length. That perspective distortion is also affected by how high the drone is and what type of field of view (FOV) you are using. If you have a fisheye type lens and you use a top-down photo, then the effect will be greater the further you go from the center of the sensor.”
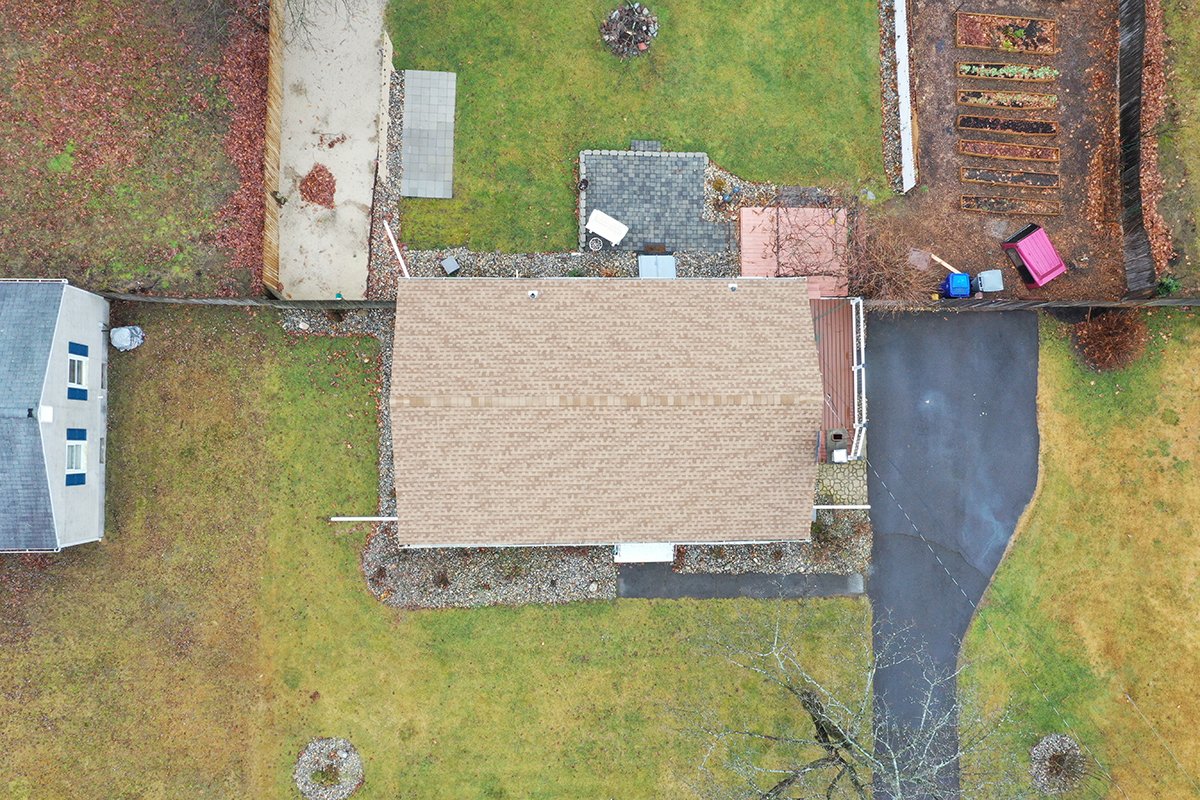
Note: The red circles show the facades, where you can see the house on the west side but not the east. This skew occurs because the image was taken from a satellite at an angle.
2. Images need manual work to account for height
A top-down photo gives you the X and Y axis but not height (the Z axis). However, real solar designs require the Z axis of everything on the property, so designers conduct a manual process in CAD to estimate the height of the roof, the pitches, and angles and calculate multiple rooflines. This also poses an issue with shading analysis because tree heights are also estimated.
The problem with this is both that it wastes time and that it’s an imperfect science, again leaving designers in a terrible situation where there’s significant room for human error (even with the most qualified and experienced designers) because the data they are given simply isn’t high quality.
3. The real ROI of drones is automation
If you’re a drone pilot who has their FAA Part 107 license and learned to fly a drone, you’ve already done the hard work. For surveying, you’re already onsite flying for a top-down photo, which takes 2-5 minutes to capture. Why not just do a full site survey with point of interest (POI) flight mode to capture X, Y, and Z axes on site?
Here’s how it looks:
| Top-Down Drone Photo | Full Drone Survey | |
| Part 107 | Required | Required |
| Learning to fly a drone | Required | Required |
| Surveying time | 2-5 minutes | 10-15 minutes |
| Design | 2-4 hours | 0.5-1 hour |
| Redesign risk | Medium-High | Low |
| Installation Risk | Call-offs on install day | Accurate, easy-to-follow instructions |
By spending an extra ~10 minutes on-site with a POI flight to capture the whole property, you save hours in the design process and all but eliminate the risk of redesigns or a call-off on installation day. What’s more, many drones can fly autonomously in a POI pattern, meaning pilots don’t need significant additional training to transition from a top-down picture to a full survey flight.
Better than nothing, but not the best
Using a drone at all, even for a top-down photo, will give you higher quality mapping of a property than only measuring the roof by hand. However, this method doesn’t achieve what you truly need, which is time-saving and elimination of human error, especially when you consider that you’ve already made an investment to get a Part 107 license, learn to fly drones and buy the drone itself.

Since you’re already flying drones, spending a few extra minutes getting a full drone survey using POI flight modes is the way to go. The 10 additional minutes will save your designers and installers hours of time and save your customers a lot of headaches, making the investment well worth it.
Furthermore, as John Novak, Scanifly’s Founder, shared, “Scanifly’s software can produce an orthomosaic map, which is a mosaic of images stitched together and distortion-corrected to a specific projection. This map is a byproduct of the photogrammetry process i.e. creating 3D models using geo-tagged data. The end user gets the best of both worlds: 3D, to scale, non-skewed data, and a single 2D, orthomosaic image based on that data.”