We know you’re in the thick of it right now.
Finishing the rush of installs before the end of the year while also preparing for what solar looks like in 2026 without the tax credit. This means taking inventory of your systems, cutting costs where you can, and making sure each software actually earns its place in your tech stack.
Our team’s been pushing to ship as many features as possible that deliver direct value to you. Features that save time, reduce clicks, and make designing in Scanifly faster and more enjoyable.
Over the past several weeks, we’ve released a lot of new design functionality:
- continuous module placement, so you can simply click and drag instead of clicking 47 times
- visual indicators that catch design mistakes to avoid wasted time
- smarter AI that does a better job placing modules in the right spots and avoiding the wrong ones
- upgraded LiDAR with broader coverage
Speed and precision shouldn’t be trade-offs. These updates are hopefully proof that they don’t have to be.
Here’s what’s live now, plus a look at what’s coming soon.
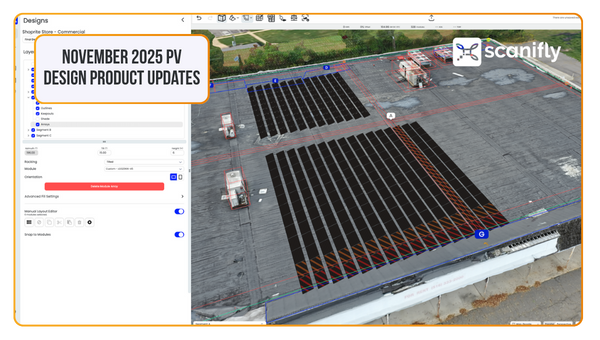
What We Shipped
⚡️ Click & Drag Module Placement
What It Is: Simply click on an active roof segment and drag to fill modules continuously. It’s a hybrid between max fill (which fills the entire roof plane) and individual clicking (which takes longer).
Why It Matters: For designs where you don’t want to max fill the roof but want to precisely place a larger array without clicking 47 times. Building arrays is now faster, more precise, and smoother overall. Available for both PrelimDesign and DroneDesign.
⚠️ Module Conflict Indicators
What It Is: Visual indicators now show when modules are placed incorrectly—in fire setback zones, on top of each other, or in keepout areas. Red means it really can’t work. Orange means it’s not recommended.
Why It Matters: A simple visual reminder that protects against accidental mistakes when you’re moving fast. Great for new designers learning proper modeling practices, and helpful for experienced teams who want an extra layer of quality control before sending designs to permitting or installation.
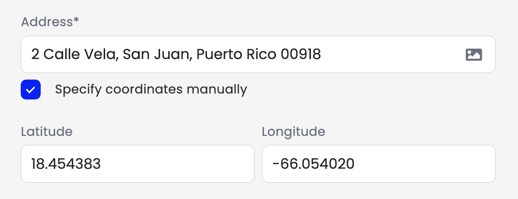
📍 Longitude & Latitude Project Creation
What It Is: Create projects by entering longitude and latitude coordinates instead of requiring a street address.
Why It Matters: A street address is an obvious starting point in urban and suburban areas, but can be difficult to identify in rural locations, on islands (like Puerto Rico), or for new construction sites. This makes it easier to pinpoint the exact location without the software defaulting to the wrong property. Especially helpful when satellite imagery is poor or addresses don’t exist yet.
🤖 Smarter AI Module Placement
What It Is: The AI now uses a specialized algorithm to identify nuanced, tricky roofs and surrounding structures. It can recognize porch and patio coverings, create the segments, but won’t automatically place panels there. It also does a better job of distinguishing driveways and sidewalks adjacent to the home.
Why It Matters: AI is only useful if it’s accurate. The old version would sometimes place modules on structures that don’t make sense for solar, which meant more cleanup work for designers. Now the AI makes smarter decisions upfront, leading to better layouts and fewer manual corrections. Our team is always working to improve our automation capabilities and will continue to do so.
🗺️ Bing Is Now Azure Maps
What It Is: Microsoft replaced Bing Maps with Azure Maps, and it’s now included in our map layers.
Why It Matters: Notable improvements include faster rendering and more modern imagery.
What’s Coming Soon
We’re not done yet. Here’s what’s next:
🎨 Layers & Properties UI Updates (Beta Testing Now)
If you haven’t tried the redesigned Layers and Properties editor yet, it’s available for beta testing on all accounts. Movable panes, tabs for distinct design components, and a cleaner workspace that adapts to your workflow. Just email our team and we’ll turn it on before the broader rollout in the coming weeks.
📐 Edit Multiple Roof Segments at Once
Currently, you have to edit tilt, azimuth, and height one roof segment at a time—either in the 3D scene or in the Properties input fields. Soon, you’ll be able to select multiple segments and update them all at once in the input fields. The workflow: activate multiple roof segments, click the Outlines tab, and edit tilt/azimuth/height. Done.
🔥 Automatic Fire Setbacks by Roof Edge
AI and manual designs will soon get preset fire setbacks based on roof edge detection. Different setbacks for ridges, eaves, and other edge types.
🛰️ Expanded LiDAR Coverage
We’re adding more LiDAR datasets with denser coverage and newer data, including the NOAA Coastal Plains Repository. This will improve remote design accuracy, especially along the coasts and in areas where LiDAR was previously limited or outdated.
Looking Ahead
Next year, no doubt, brings uncertainty. And while we can’t control policy or market conditions, we can control how fast we ship new features that help you win more deals, design faster, and run more efficient operations.
That’s what we’re focused on.
More updates coming soon! If you run into any issues or have feedback on these new features, we’re always listening.