
Drones, cloud computing, and AI are making it easier than ever to do a solar site survey without needing to climb on the roof or hand-draw sketches. The problem is that technology feels less straightforward, even though it’s fairly simple to use with the right steps. In particular, surveyors should follow four strategies that make surveying easier and more efficient, especially when using drones.
Strategy 1: Check aerial imagery before going on-site
Perhaps the biggest shift between the manual way of doing solar site surveys (ladders and tape measures) and the 21st century way (drones and software) is the set up. When climbing on the roof, you need to consider roof health, pitch and any trees that dangle close by. With a drone, you need to check airspace.
Aerial imagery is the best – and often the only – way to give you a sense of the space before visiting. Here’s why:
-
Solar overview: A quick aerial image will show you if the area is good for solar at all (for example: having good south-facing roof planes).
-
Directs your surveying efforts: While not perfectly clear, aerial images can usually give you a rough estimate for how many panels can fit on a site.
-
Helps you identify necessary equipment: When you get a bird’s eye view with aerial images, you can better understand what tools might be necessary based on the home’s shape.
These data points help inform surveys prior to going onsite.
Strategy 2: Confirm everything with a drone on-site
While aerial imagery is helpful, nearly all (98%) of surveyors report they need to confirm measurements with a visit to the project site. However, this shouldn’t be considered a bad thing. I often like to describe solar work as installing a mini power plant on someone’s home, so you absolutely want to understand everything about a system before install day.
Drones make the entire process incredibly efficient. First, you don’t need to bring a commercial vehicle. You can show up in a fuel efficient or electric car, further demonstrating your commitment to clean energy. Then you can set up and fly your drone for 10-15 minutes to survey the house with a point of interest (POI) flight, which includes a context flight and 1-3 detail flights.
The best part is many drones fly almost autonomously, making the surveyor’s job even easier.
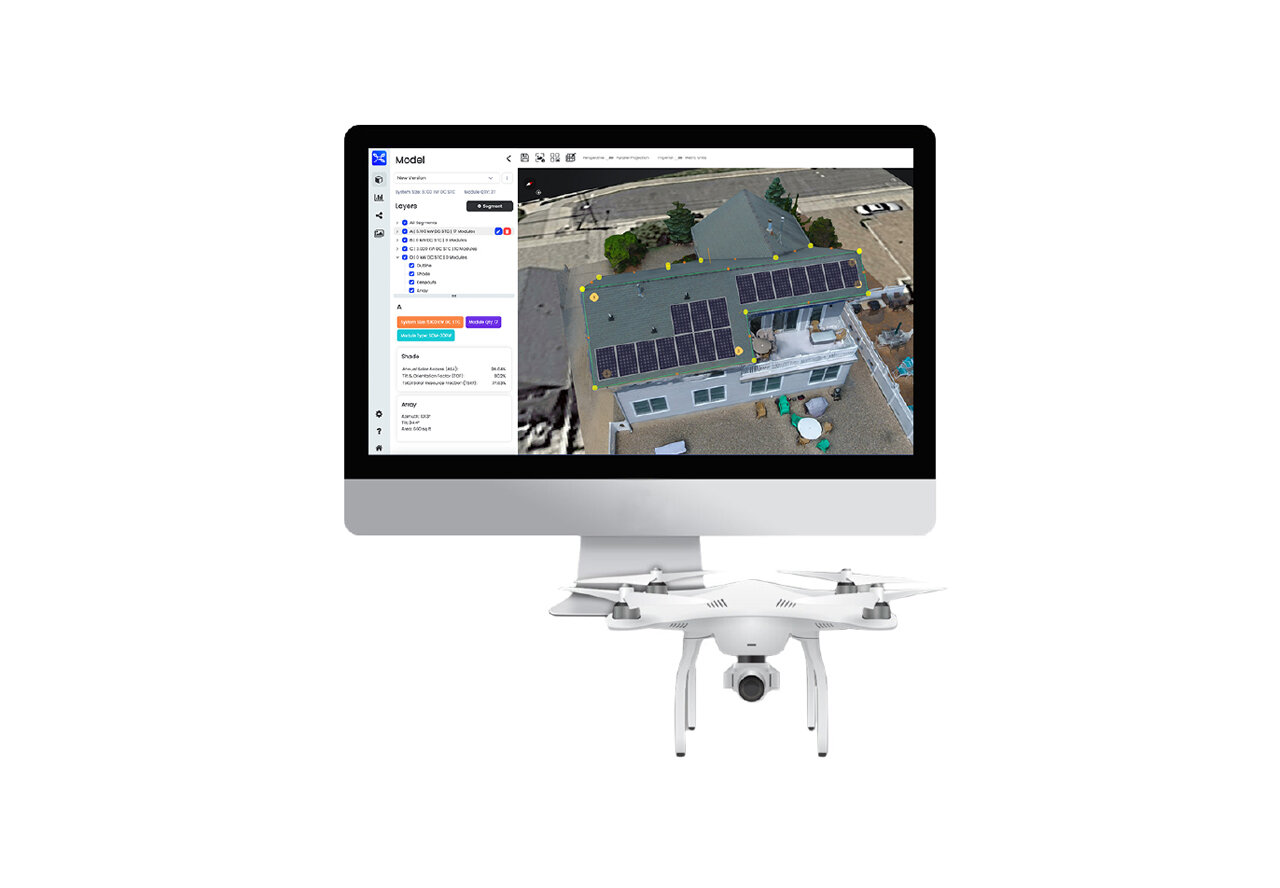
These flights produce around 150-250 images for a typical home (and 250-750 images for a larger project), which then produces to-scale 3D models that designers can use to make their plans and share with other people, including customers.
Overall, drone surveys are up to 5x more efficient than manual surveys while remaining accurate to within a few inches, making them a great investment in the solar survey process.
Strategy 3: Capture the surrounding area for context
After getting roof details with drones, make sure to gather other information such as:

-
Site context: It’s critical to have overall site context so someone looking through images later will understand where everything is. This is where drones are very valuable because they can capture things not seen from the ground. These include images of trees, nearby structures or anything else that would impact a system.
-
Small details: Any cavernous areas due to roof lines that need extra detail.
-
Electrical path: Open space near the electrical meter.
-
Conduit location: An understanding of where the conduit could be placed.
-
Underground obstructions: You need to know about things like septic systems or existing trenching. This can be hard to identify at ground level, but can be easier from the air because a drone will pick up the ground perspective change.
These types of details are necessary for a successful installation plan, so it’s worth checking them out.
Strategy 4: Assess interior home details
This step is the final step and is the most manual, since you can’t fly a drone inside most people’s homes. However, you should check key things including:
-
The attic: Confirm roof joists are solid and there won’t be any issues with panel installation.
-
Structural facets of the property: From the roof to any part of the walls where you’ll be installing wires or conduits, ensure the edifice is sound.
-
Electrical components: Ensure the electrical work is up to code, able to handle a solar panel load, and can easily connect to the meter.
-
Conduit planning: When inside, you’ll need to identify how you will connect your solar panels to the relevant electrical equipment.
A good interior plan is the last step, but is equally important to a good exterior plan. When both are done well and supported by high-quality images, then designers and installers will have a strong foundation to work from.
Let technology make surveying safer and more efficient
We know the perception is that drones might be cool, but solar surveying is serious work and requires cutting edge tools. Used properly, drones can be extensions of your team. Getting a drone license (called a Part 107) is a serious thing – though thankfully you can get a Part 107 license in a week if you work hard – and it helps surveyors do their work more efficiently.
Using 21st century technology means solar site surveying that is faster, safer, and more accurate. That means solar contractors can take advantage of the massive opportunity that lies ahead as demand for solar skyrockets across the country.